The Beaufighter II was conceived as an insurance against a shortage of Hercules engines by adapting the airframe to take a pair of Merlins. The lower power and reduced directional stability due to the larger cowlings meant that it was the least succesful variant but a widely used one even so. The model was my first after a break of three years and was chosen when I found a reference to the Beaufighter II being used by 404 (RCAF) Squadron of Coastal Command based at Chivenor early in 1943. This gave the chance of an unusual colour scheme for the Mark II and fitted with my new theme of 'WWII RAF aircraft in Devon and Cornwall'. Further research suggested that I would be building a 404 Squadron Mark X so I then settled on a 307 (Polish) Squadron machine, based at Exeter in the nightfighter role (but see later).
I had already purchased the Magna Models Beaufighter II conversion kit (the alternative route is a High Planes complete kit) and the suggested Airfix Beafighter TF.X to partner it. The Magna parts include resin wings, engines and spinners with metal propellor blades and a choice of exhausts together with vacformed clear landing light covers. As many of you will be aware the Airfix kit is the worst Beaufighter kit around (state of the art circa 1959) but it was the most widely available when Magna launched their conversion. I was also able to use some parts from the Hasegawa TF.X that I will use for another model in the theme, especially as I had an Aires cockpit set for it.
My first move was some major surgery as I was not happy with Magna's suggestion of butt jointing the wings so I opened out the Airfix kit wing roots and trimmed the pouring block on the Magna parts until I had a 'sleeve' joint (see photo).

Other modifications to the Airfix kit parts at this point included removal of the 'seats', thinning of the cockpit walls, reduction of the fabric effect of the rudder and elevators by gentle sanding, opening out a tailwheel well (I cheated slightly by leaving the portion of fuselage with the tailwheel mounting hole) and drilling a 7mm hole in parts 18 and 19 (to replace the wheel hubs). The interior was then detailed with the Hasegawa cockpit parts using 60 thou plastic card for the front spar and the floor of the observer's position (see photo).

One (probably the only) benefit of the Airfix kit is that although the tailplanes are designed to be fitted with dihedral they are, in fact, the correct size for the earlier flat tailplane fitted to most Mark I and II a/c. A quick trim of the mounting tab is all that is necessary for correct tailplanes.
Having completed basic assembly I had a fit of madness and decided to use a set of Falcon vac-formed canopies, cutting away the fuselage to use the largest possible amount of the observer's canopy. After struggling with the fit I noticed the Falcon instructions mentioned the Novo or Matchbox kits as alternatives (standard engineering dictum - when all else fails read the instructions) and I had to return to using the Airfix pilot's canopy and loads of filler around the Falcon observer's one. Filler was also used in quantity at the wing roots before the model was ready for the detail parts to be added prior to painting (see photo).

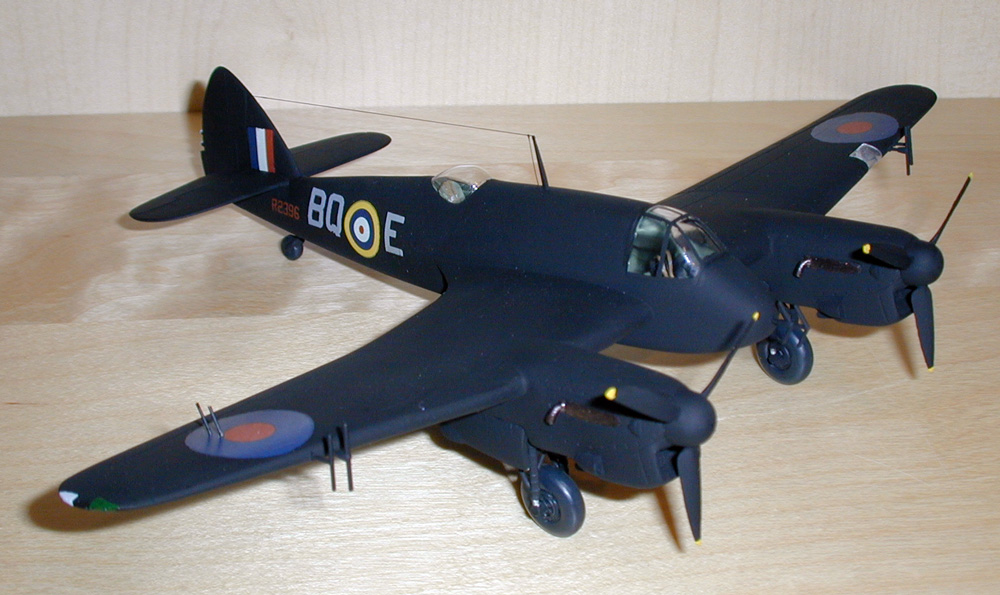
Painting with all these vulnerable additions was fraught, but successful, using Tamiya Matt Black. The area of the decals was then gloss varnished (Tamiya) and the decals (all Modeldecal) applied. They were then coated with matt varnish and masked with Maskol before a final coat of Matt Black was applied (this seemed the best way to get the RDM2 Special Night finish whch was described as 'like velvet'). No attempt was made at weathering, although RDM2 weathered horribly, as I don't usually weather my models and I couldn't see a way to get the peculiar appearance of weathered RDM2.
The last thing was to paint the navigation lights, fit the main wheels (spoked hubs facing out) and use some stretched sprue for the wire part of the radio aerial. The first model in the theme is now complete, look out for more to come.